


In this article, we will step by step learn how to build your own agent using the TaskingAI Python SDK.
Prerequisites
First, log in to the TaskingAI console, select an existing project or create a new one, and obtain your TaskingAI API Key. This key is essential for authentication, so please keep it secure.
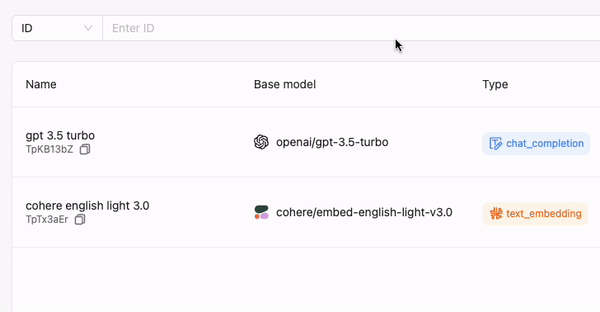
Next, obtain a model_id: Create a model that you intend to use as the foundation LLM for your agent, then find and copy the model_id of this model.
The taskingai package is required to interact with the TaskingAI cloud service using Python (version 3.8 or above). This can be easily installed using pip:
pip install taskingai
Setting Up Your Credentials
To set up your API key, you can choose one of the following methods:
- (Recommended) Set it as an environment variable on your local system, and the SDK will automatically load the key:
1export TASKINGAI_API_KEY=YOUR_API_KEY- Specify your API key directly to the SDK by passing it as a parameter to the
initfunction in your Python code:
1import taskingai
2
3taskingai.init(api_key='YOUR_API_KEY')
Start with a Simple Assistant
For our first attempt, we'll create a very basic assistant where only the model_id and memory are mandatory parameters. The model_id determines the base model of the assistant, while the memory parameter specifies that the assistant should use a message_window type of memory, retaining up to 20 messages and a maximum of 1000 tokens to manage conversation context effectively.
1assistant = taskingai.assistant.create_assistant(
2    model_id="TpXkHs3Y",
3    memory={"type": "message_window", "max_messages": 20, "max_tokens": 1000},
4)
5print(f"created assistant: {assistant}\n")
The printed result:
1created assistant: assistant_id='X5lMjdSlZuDNecYR4juIZ4ij' model_id='TpXkHs3Y' name='' description='' system_prompt_template=[] memory=AssistantMemory(type=<AssistantMemoryType.MESSAGE_WINDOW: 'message_window'>, max_messages=20, max_tokens=1000) tools=[] retrievals=[] retrieval_configs=RetrievalConfig(top_k=3, max_tokens=None, method=<RetrievalMethod.USER_MESSAGE: 'user_message'>) metadata={} updated_timestamp=1713337296392 created_timestamp=1713337296392Now the assistant can conduct a basic conversation with you. To begin, we create a chat object.
1chat: Chat = taskingai.assistant.create_chat(
2    assistant_id=assistant.assistant_id,
3)
Here's an example of how to create and generate messages to chat with the assistant:
1from taskingai.assistant import Message
2
3# create user message
4taskingai.assistant.create_message(
5    assistant_id=assistant.assistant_id,
6    chat_id=chat.chat_id,
7    text="Hello, who are you",
8)
9
10# generate assistant response
11assistant_message: Message = taskingai.assistant.generate_message(
12    assistant_id=assistant.assistant_id,
13    chat_id=chat.chat_id,
14)
15print(f"Assistant: {assistant_message.content.text}")
Its response:
1Assistant: Hello! I'm an AI language model developed by OpenAI. I'm here to help answer any questions you may have or engage in a conversation with you. How can I assist you today?Now you've mastered the basics of using TaskingAI to create a stateful assistant!
Evolving the Assistant
If you want to create an assistant that is smarter and more powerful, discovering the capabilities of TaskingAI will be a rewarding experience.
Tool Usage
TaskingAI empowers you to customize the tools your assistant can use. Here's how to implement an action: Firstly, we need to define this action following the OpenAPI schema. We will use numbersapi as an example. It's a publicly available API that provides fun facts about numbers.
1from typing import List
2
3NUMBERS_API_SCHEMA = {
4    "openapi": "3.0.0",
5    "info": {
6        "title": "Numbers API",
7        "version": "1.0.0",
8        "description": "API for fetching interesting number facts",
9    },
10    "servers": [{"url": "http://numbersapi.com"}],
11    "paths": {
12        "/{number}": {
13            "get": {
14                "description": "Get a fact about a number",
15                "operationId": "getNumberFact",
16                "parameters": [
17                    {
18                        "name": "number",
19                        "in": "path",
20                        "required": True,
21                        "description": "The number to get the fact for",
22                        "schema": {"type": "integer"},
23                    }
24                ],
25                "responses": {
26                    "200": {
27                        "description": "A fact about the number",
28                        "content": {"text/plain": {"schema": {"type": "string"}}},
29                    }
30                },
31            }
32        }
33    },
34}
35
36# creates actions corresponding to each API path and method.
37actions = taskingai.tool.bulk_create_actions(
38    openapi_schema=NUMBERS_API_SCHEMA,
39)
40
41action = actions[0]
We can utilize the newly created action to update the assistant with the update_assistant method. Concurrently, providing the assistant with a name, description, and system prompt will enhance its usability.
1assistant = taskingai.assistant.update_assistant(
2    name="My Assistant",
3    description="A assistant who knows the meaning of various numbers.",
4    assistant_id=assistant.assistant_id,
5    system_prompt_template=[
6        "You know the meaning of various numbers."
7    ],
8    tools=[
9        {"type": "action", "id": action.action_id}
10    ],
11)
12print(f"updated assistant: {assistant}\n")
The printed result:
1created assistant: assistant_id='X5lMhtEeaUmQK5Py6fxipacB' model_id='TpXkHs3Y' name='My Assistant' description='A assistant who knows the meaning of various numbers.' system_prompt_template=['You know the meaning of various numbers.', "No matter what the user's language is, you will use the {{langugae}} to explain."] memory=AssistantMemory(type=<AssistantMemoryType.MESSAGE_WINDOW: 'message_window'>, max_messages=20, max_tokens=1000) tools=[ToolRef(type=<ToolType.ACTION: 'action'>, id='bFBdvwujtFhBIIxkBDSuwEoo')] retrievals=[] retrieval_configs=RetrievalConfig(top_k=3, max_tokens=None, method=<RetrievalMethod.USER_MESSAGE: 'user_message'>) metadata={'k': 'v'} updated_timestamp=1713276094707 created_timestamp=1713276094707Now, let's test the assistant's ability to call the numbersapi. We ask for the meaning of 128.
1# create user message
2user_message = taskingai.assistant.create_message(
3    assistant_id=assistant.assistant_id,
4    chat_id=chat.chat_id,
5    text="What is the meaning of 128?",
6)
7
8# generate assistant response
9assistant_message = taskingai.assistant.generate_message(
10    assistant_id=assistant.assistant_id,
11    chat_id=chat.chat_id,
12)
13
14print(f"Assistant: {assistant_message.content.text}")
The printed result:
1Assistant: 128 is the number of characters in the ASCII character set. This information is sourced from the numbersapi.By now, you should understand how to enhance your AI assistant with various tools. TaskingAI, a feature-rich AI system, still has more to offer. It comes with sophisticated features like plugin integration and the Retrieval-Augmented Generation (RAG) system, both of which await your exploration. For a more in-depth understanding, check out our thorough documentation.


